
ONLYOFFICE has steadily built a solid reputation as a great open source alternative to mainstream office suites. Its recent major update saw the introduction of a redesigned interface, better support for right-to-left languages, and many other handy enhancements aimed at improving usability across all editors.
Unlike Microsoft 365 Copilot, which sits behind a paywall and ecosystem requirements, ONLYOFFICE’s AI tools are part of a more open, flexible setup. You don't have to worry about enterprise licenses or vendor lock-in.
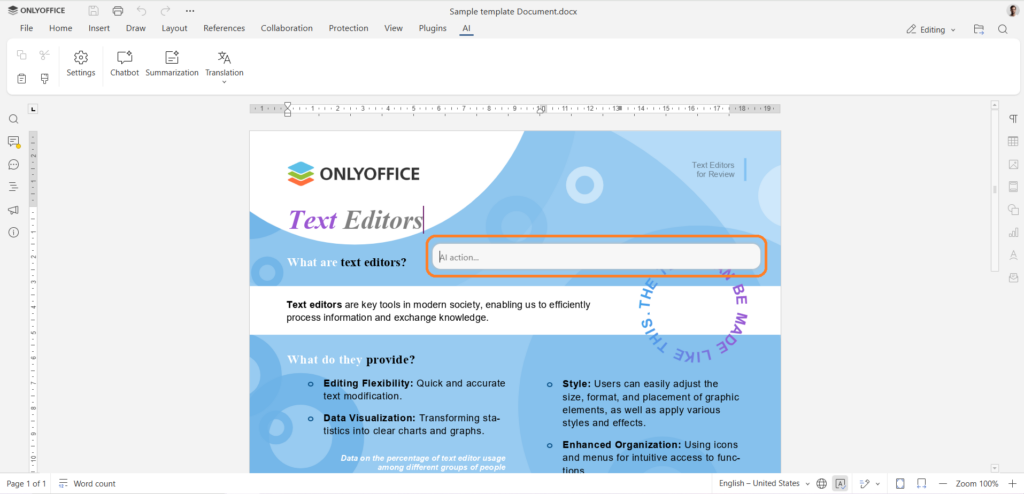
The latest addition to the office suite is an AI agent, now in beta, that lets users type natural-language commands directly in editors.
ONLYOFFICE AI Agent: What to Expect?
The new AI agent is an upgrade to ONLYOFFICE's existing AI plugin. It supports multiple AI providers and can run both in the cloud and locally. You can even add custom functions to fit your needs.
In the Document Editor, it can generate entire text blocks, rewrite selected content, explain parts of a document in comments, or apply formatting like turning paragraphs into headings. You can also ask it to change tone or structure.
Similarly, in the Presentation Editor, the AI agent can add new slides, insert shapes with labels, change slide backgrounds, and create charts or diagrams from raw data.
And, for the Spreadsheet Editor, the AI can summarize data from pivot tables, apply filters, sort columns, and build charts and diagrams.
Want to Try it Out?
Start by downloading ONLYOFFICE version 9.0.4 or higher (applies to Docs, DocSpace, and Desktop Editors). This version is required to access the new AI agent feature.
Then, open any editor, go to Plugins → Plugin Manager, and install or update the AI plugin to version 2.4 or newer. Once installed, activate it through Plugins → Background Plugins. This step ensures the assistant runs continuously in the background while you work.
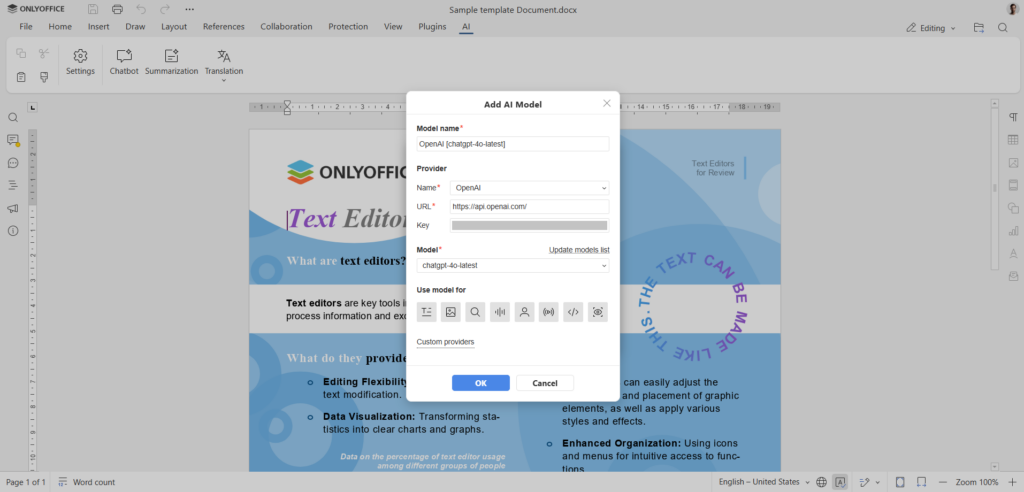
Go to AI tab → Settings. Under "Edit AI models", click the "+" icon and choose your preferred provider from the list. Enter your API key and click "Update models list". You will then see a list of models to choose from. Select one and click "OK".
If you're using LM Studio or Ollama, you don’t need an API key. But you do need to set the correct base URL to connect to the model.
After that, go back into Settings and assign a model for the chatbot. This sets the default AI model used for your requests. That’s it. The AI agent is now installed and ready to use.
To start using it, open any editor, press Ctrl + /, and enter your request in the floating panel.
Suggested Read 📖
- Even the biggest players in the Linux world don't care about desktop Linux users. We do.
- We don't put informational content behind paywall. Your support keeps it open for everyone. Think of it like 'pay it forward'.
- Don't like ads? With the Plus membership, you get an ad-free reading experience.
- When millions of AI-generated content is being published daily, you read and learn from real human Linux users.
- It costs just $2 a month, less than the cost of your favorite burger.
Become a Plus Member today and join over 300 people in supporting our work.