Last year, this time around, Arch Linux introduced a guided installer to make the installation process easier.
All you had to do was type in “archinstall” to get started with the step-by-step installation without needing to customize all by yourself.
Not just for new users, it should also save you some time to install Arch Linux in general. You get all the essential options starting from creating username/root user, selecting the desktop, picking software packages, choosing the audio server, and more.
If you are curious, you can take a look at archinstall in action in our installation guide for Arch Linux on VirtualBox.
Now, with archinstall v2.4.1, we have a new menu system and numerous technical changes.
Let us take a look at it and how it works.
Archinstall’s New Menu System & Accessibility Improvements

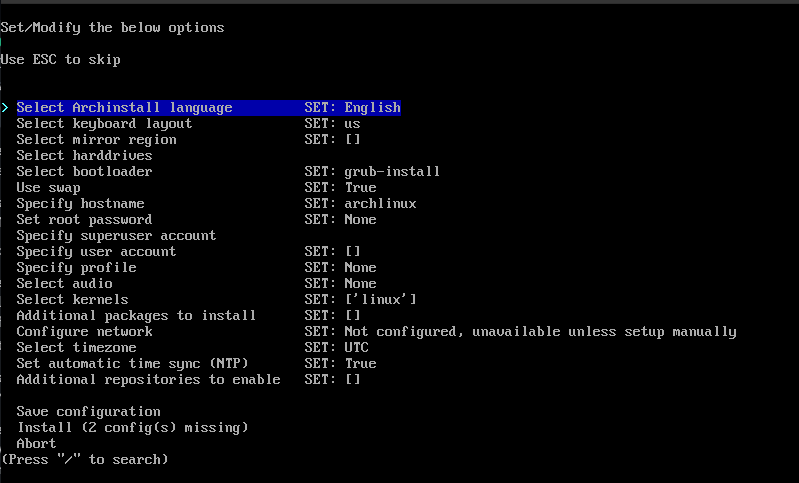
The new menu system looks much more organized.
It is built using simple-term-menu as its base, which is a package to create interactive menus on the command line. To avoid external dependencies, it has been bundled with the source, all thanks to Ingo Meyer.
Other developers include Werner Llácer and Daniel to make this work with 1200+ lines of code.
The menu system is also accessibility friendly. You can switch it to the tracking selection mode using the “numpad *”, which should make espeakup work, as one would expect.
In future archinstall versions, it will honor default tracking mode as well.
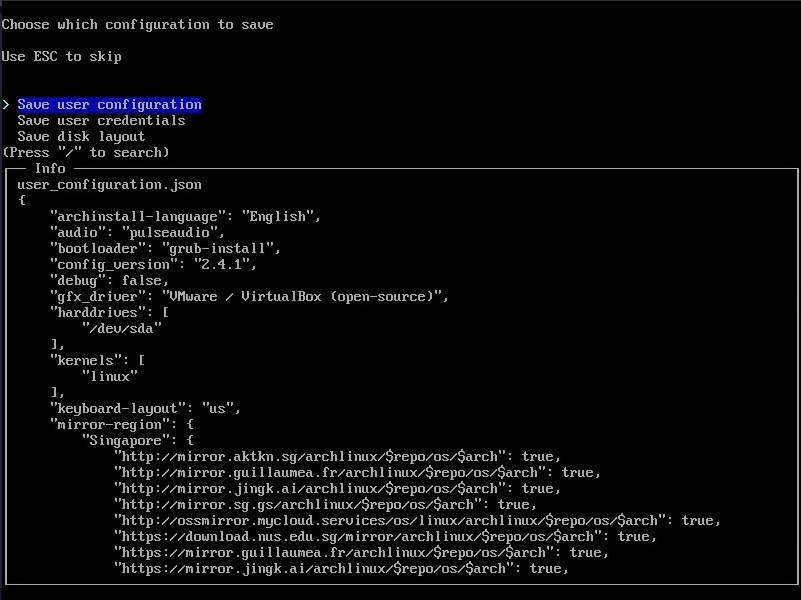
As you can notice in the screenshot above, you get to set the language, keyboard layout, kernels, audio server, user, network, and more essential options.
Once you select the hard drive, the menu will add another option to let you choose a “disk layout” where you can select the type of file system.

Similarly, as you proceed with each option, you will get access to more things to tweak like the profiles to set your desktop environment:

By default, you have a swap enabled. But, you can tweak that as you require. Overall, it should be a seamless experience, with all installation prerequisites presented in a menu form.
Thanks to Sreenath on our team for testing this through to give you some screenshots:

In addition to these changes, you can also expect the following improvements:
- BTRFS compression option added as an option if you select btrfs as filesystem.
- Archinstall now supports multiple NIC configurations at the same time for manual configuration
- The installer keeps track of which packages have been installed through archinstall.Installer()
To explore all the technical changes and bug fixes, you can refer to the release notes on GitHub.
You can wait for the latest ISO (scheduled for May 1) to try it out, or download it from GitHub and try it yourself.
Have you tried the original guided installer on Arch Linux? Or do you prefer to configure everything without the installer? Feel free to let me know your thoughts below.
- Even the biggest players in the Linux world don't care about desktop Linux users. We do.
- We don't put informational content behind paywall. Your support keeps it open for everyone. Think of it like 'pay it forward'.
- Don't like ads? With the Plus membership, you get an ad-free reading experience.
- When millions of AI-generated content is being published daily, you read and learn from real human Linux users.
- It costs just $2 a month, less than the cost of your favorite burger.
Become a Plus Member today and join over 300 people in supporting our work.


